Bathroom and Kitchen Applications with Siliconized Sealant
In areas exposed to water, such as bathrooms and kitchens, properly filling joints and gaps is critical for both hygiene and aesthetics. Siliconized sealant is frequently preferred in these areas due to its water-resistant and elastic properties. In this article, we will examine in detail the methods and points to consider when using silicone-based sealant in bathroom and kitchen applications.
Why Siliconized Sealant?
Sealants used in bathroom and kitchen applications must be resistant to water and moisture. Siliconized sealant:
- It is water-resistant and prevents mold growth.
- Its elastic structure allows it to adapt to joint movements.
- It is easy to apply and provides an aesthetically pleasing appearance.
- Available in various colors to match the surface.
Pre-Application Preparation
- Surface cleaning: Ceramic, tile, and sink surfaces should be cleaned of dust and grease.
- Dryness: The surface must be completely dry.
- Old mastic residue: If present, it should be cleaned.
- Masking tape: Tape can be used to protect edges and ensure a clean application.
Step-by-Step Sealant Application
1. Preparing the Sealant Cartridge
The tip of the sealant cartridge should be cut to match the width of the joint and inserted into the gun. Cutting the tip ensures a smooth sealant flow.
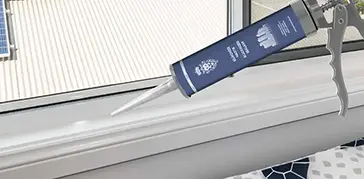
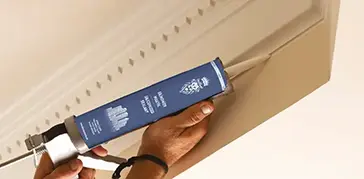
2. Applying Sealant
Hold the gun at approximately a 45-degree angle and apply sealant to the joint. Important points to note:
- The joint must be completely filled.
- No air bubbles should form.
- The gun should be moved in a steady and controlled manner.
3. Surface Smoothing
After applying the sealant, the surface should be smoothed with a spatula or your fingers. A slightly damp spatula ensures an aesthetically pleasing and even appearance.
4. Cleaning Up Excess Product
Excess sealant should be removed with a damp cloth or spatula. If masking tape was used, it should be removed after it has dried.
5. Curing Period
The sealant should not be touched until it is completely dry. Drying time varies depending on ambient conditions and joint depth. Manufacturer's instructions should be followed.
Common Mistakes and Their Solutions
- Insufficient surface cleanliness: Prevents adhesion. Solution: Clean and dry the surface.
- Incorrect gun usage: Air bubbles and uneven filling occur. Solution: Use the gun at a constant speed and angle.
- Failure to adhere to the curing time: The sealant will deform. Solution: Pay attention to the curing time.
- Incorrect joint width: Insufficient filler. Solution: Apply the appropriate filler to the joint dimensions.
Tips
- Joint width and depth must be measured accurately.
- Planning should be done in accordance with the institution's timeframe.
- Clean edges can be achieved with masking tape.
- The gun's angle and speed must be controlled.
- The surface should not be touched during application.
Conclusion
Using silicone sealant in bathroom and kitchen applications is critically important for both watertightness and aesthetic appearance. By paying attention to proper surface preparation, application technique, and drying time, you can achieve long-lasting and safe applications.
The information in this text may vary from time to time depending on the manufacturer. Always check the product label.