How to Apply Siliconized Sealant? Step-by-Step Application Guide
Siliconized sealant plays a vital role in the construction industry as a joint and gap filling material. However, if not applied correctly, the desired performance cannot be achieved. Therefore, it is important to learn the application process step by step and to know the points to pay attention to. Here are all the details to consider when applying siliconized sealant.
Pre-Application Preparation
Before application, the surface must be clean, dry, and free of grease. Dust, dirt, or moisture can prevent the sealant from adhering and reduce its performance. Therefore, the following steps should be followed:
- Surface cleaning: Dust, dirt, oil, and old sealant residue must be removed.
- Dryness check: The surface must be completely dry. Damp surfaces will make it difficult for the sealant to adhere.
- Masking (Protective tape): Protecting the joint edges with tape ensures a clean appearance after application.
Application Tools
Several basic tools are required to apply silicone sealant:
- Sealant gun: Used to neatly squeeze sealant from cartridges.
- Spatula or sealant smoothing tool: Used to smooth the surface after application and remove excess product.
- Cleaning cloth: Used to wipe away excess mastic.
Step-by-Step Application
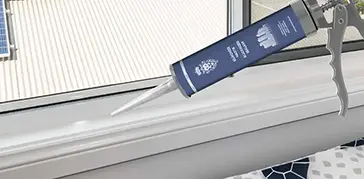
1. Preparing the Sealant Cartridge
Trim the tip of the sealant cartridge and insert it into the gun. The tip cut should match the width of the joint to be filled. This ensures the sealant flows smoothly across the joint.
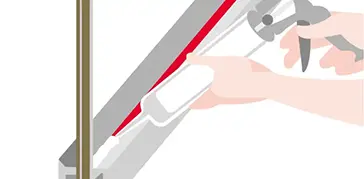
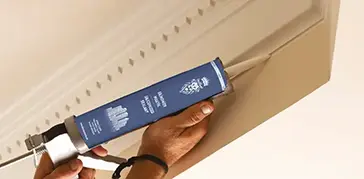
2. Applying Sealant
Apply the sealant to the joint by moving the gun forward at a steady speed. Important points to note:
- The sealant should completely fill the gaps, leaving no air bubbles.
- The gun angle should be approximately 45 degrees during application.
3. Surface Smoothing
After applying the sealant, the surface should be smoothed using a spatula or your fingers. This ensures an aesthetically pleasing and even filling. Water or a special sealant smoothing gel can be used during smoothing.
4. Installation and Fixing
After application, the sealant must be allowed to dry. Drying time may vary depending on ambient temperature, humidity, and the type of sealant. The surface should not be touched before it is completely dry.
5. Removing the Masking Tape
If tape is applied after the sealant has dried, it should be carefully removed shortly afterward. This ensures clean and smooth edges.
Common Mistakes and Suggested Solutions
Some mistakes made during the application of silicone sealant can negatively affect performance. Here are some things to watch out for:
- Inadequate surface preparation: Sealant will not adhere or provide a proper seal on dirty or damp surfaces.
- Improper use of the sealant gun: Spraying too quickly or unevenly will lead to air bubbles.
- Failure to observe the drying time: Deformation will occur if contact is made before complete drying.
- Incorrect spatula usage: Failure to smooth the surface spoils the aesthetic appearance.
Application Tips
Here are some practical tips to improve performance and ensure a long-lasting application:
- Measure the joint width accurately before applying the sealant.
- Move the gun at a constant and steady speed during the application.
- Lightly moisten the spatula during the finishing process; this prevents the sealant from sticking and ensures a smooth surface.
- Always plan the drying time according to the manufacturer's recommendations.
Conclusion
When applied correctly and with care, silicone sealant application provides durable, aesthetically pleasing, and long-lasting results. Surface preparation, the use of appropriate tools, and step-by-step application are key to success. By following this guide, you can safely use silicone sealant in both interior and exterior applications.
The information in this text may vary from time to time depending on the manufacturer. Always check the product label.